Monthly Archives: June 2015

Metavis
 I have been using this tool for the last 5 plus years and have written on behalf of Metavis documentation around the best practices of migration including a lot of the content on my previous blog about Migration Domination. I have co-presented with them at SharePoint events and really enjoy the partnership.
However, and I have made it clear to Peter and the support crew that sometimes I do not like their product. This is usually something that has occurred that is either user error (mine) or just the tool frustrating me because it didn’t do what I expected it to do. They calmly talk me off the ledge and explain “environments vary from one to the next” That is the key with all of these products. They are doing what they are supposed to do but the environment especially the tenancy in O365 are in constant flux and they are doing the best they can to stay up with it.
I am not going to lie, this is one of my favorite tools because it really has everything (ok almost everything) I need to be successful. They are also really great about taking the feedback you provide and making the enhancement to the tool if they feel it would benefit the great community at large. Matter of fact I just did this with them last week with regards to the Pre-Migration report for a File Share and how it was inconsistent about the way the report rendered based on the level inside the file share you run the report. Now it actually provides the detail about the Folder Structure of the file share consistantly through the report regardless of the location you run it against. This helps when you are trying to create tagging in a Term Store.
Now onto the evaluation.
- Long Term Use: I have clients that are using this tool to run reports even after the migration has long since completed. Using all of the analytics it provides for security, content, term store, back up etc. Just makes this an investment you can really get your ROI on.
- Pre-Migration Reports: This report is pretty darn good, It allows you to customize the reporting criteria based on your individual environment. It sets a basic level based on migrating to O365 but those are easily adjusted to evaluate on-prem to on-prem. They are constantly adding to this report enhancements to give you all of the detail you need when it comes to the planning of your migration and doing a thorough assessment of your content. The report provides details around features, templates, web parts, workflows, master pages, lists and libraries. Highlights the areas you need to pay attention to using the signal light coloring Green (good to go), Yellow (evaluate and re-mediate the issues) and Red (STOP! we have an issues that really needs to be re-mediated before you do your migration.) It is a simple process but one that is easily to follow and understand.
- Reporting: When it comes to the reporting, especially for O365 environments it really has it locked in. Because the logging and ootb analytics are not enabled on O365 this tool does a good job of getting you information you need that is helpful. It also has a graphical interface that is pretty sweet as well. The reports can be ran for security at the site, library, item and user level, document types, check-out documents, size of the site collection or sub-site and the list goes on. It really does help you manage your O365 environment.
- Limitations: With all good things has to be some bad. Ok, not really bad just annoying. In using this tool I find that it has some inconsistencies. I had a situation where we are trying to do a structure migration that included content types and site columns. It just wouldn’t bring over everything, and every time we did the migration we got different results. Now I know that environmental issues could have played a factor in this, but this is basic stuff and just didn’t work as well. Occasionally it will not bring over the entire structure including sub-sites and lists and library columns. Again this is where using the validation i spoke about in an earlier blog will help with that during the test migration.
Although I was not going to talk about cost and with Metavis they do not provide a pricing metrics. The product is tied to how much data you want to move and they offer a variety of price points as well as products and options.
The Vendors are coming, the MIGRATION vendors are here!!!
 I have been doing migrations it seems like forever, and with every version or job I get the ability to try new ones. I have the most experience with Metavis and Metalogix and I got to tell you I love them both for different reasons. But there is this new guy on the block going for the title ShareGate!
This series is going to look at each of individually and I am going to give you my honest opinion on each of the.
So here is what we are going to do we are going to evaluate these tools based on the following:
- Long Term Use (it usually cost for these tools let see if they re-purpose)
- Pre-Migation Reports (how much information do they give us)
- Reporting (Additional analytics they can provide)
- Limitations (What are they missing)
I would include cost in this list but there are too many variables.
Hope you enjoy this series

Test Migrations
 As I mentioned in the first blog, you will want to do a test migration to a dev or test environment. This is to ensure that all of the necessary items that have been set in the pre-work are in place. While no migration can be 100% this is a good way to validate as many steps as possible
Testing will allow you to take a sample of the source environment and move it to the target to validate that all of the content types and associated items. It also solidifies your plan of attack.
When I do my test migration regardless of size I use the following format:
- Copy the structure for the top of the site collection, this includes the list, libraries, content types and permissions. This DOES NOT include any of the actual content.
- Validate that all of those items actually made the trip to my target test environment.
Why do I do the top level first? Because all of the sub-sites and content below are in some form or fashion getting the information from the root site collection. All of the site columns and content types are stored at the root. The permissions all live at the root level, it also allows me to clean out all of those old permissions that are left over from users who are no longer with the company and provide a clean place to validate and do a permissions audit.
After the root site has been migrated and any troubleshooting has been completed, I use the next migration to copy the rest of the structure of the site collection and sub-sites. As before you will do all of the information but not include the actual content. Validate it all is in place and move on to the actual migration of the content.
I use a variety of third party tools for my migration efforts, Metavis, Metalogix and ShareGate. There is something for every budget and every need. I will be doing a review of these tools in future blogs but for now the general principal is then same.
Migrate the root site first of all of the content. You know those validation steps we mentioned in the previous blog, this is where you will do them. Remember this is a sample of content you are testing not every single piece of content. I have seen where companies will want a complete mirror environment of production. That is something that can be done now but depending on your schedule and budget is something that can also be done further down the road.
If your test migration has a few glitches that is to be expected, as I said before all environments have their own quirks and you will need to adjust to them as they happen. You may even need to re-migrate content again to ensure you have addressed the glitches. However, if you have followed all of the steps and done all of the pre-work you are on the road to successful migration.
Migrations take time and are not something that you will want rush, there are a lot of factors to consider when you do them, resources, throttling on the tenant, bandwidth, but mostly it is time consuming but so worth it when it is all moved and in the new environment.
I hope you have enjoyed this series I am sure I will be fine tuning it but keep on checking back for latest information and if you need any help just leave me a comment and I will get back to you.

Conduct Migration Pre-Work
Before you move the first piece of content you need to ensure that the target location is ready to accept it.
What does that mean? Well get ready this is going to be the biggest of all of the section of this series and have several parts, why? because a lot of information has to be done prior to ensure it will be successful.
- Create Migration Schedules
- Content Mapping
- Checklists
- Pre-Migration Checklist
- Migration Checklist
- Validation
So let’s get started!
Create Migration Schedules and Checklists
The use of these schedules and checklists will help your migration ensure that it is successful and make sure that nothing is forgotten or left out when you are doing your migration. I have created an excel spreadsheet with all of these checklists located inside one document for your convenience. Additionally you can use these list to create list templates in your SharePoint environment so everyone can track the progress of the project.
Migration Schedule
Once a site has been scheduled for migration create a new Migration Schedule this will be a quick reference that will have all the tasks associated with the migration. This schedule can be in the form or a Project Timeline, a Calendar or even in One Note.
Planning out every phase of a migration is key to ensure you are successful. It doesn’t matter the tool you use just as long as you track your milestone and deliverables.
Below is an example of the types of milestone that need to be tracked. Using Microsoft Project as shown can help you with a quick at a glance.
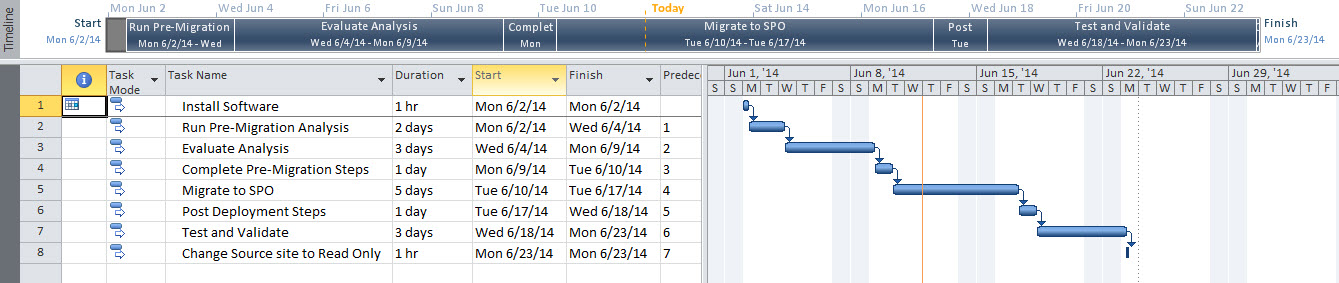
Additionally, you can add additional sub-tasks at each level to ensure nothing is missed.
It is also useful to have a calendar that is accessible to all of the Site users that will show the dates of the migration so that everyone has a point of reference.
Content Mapping for Migration
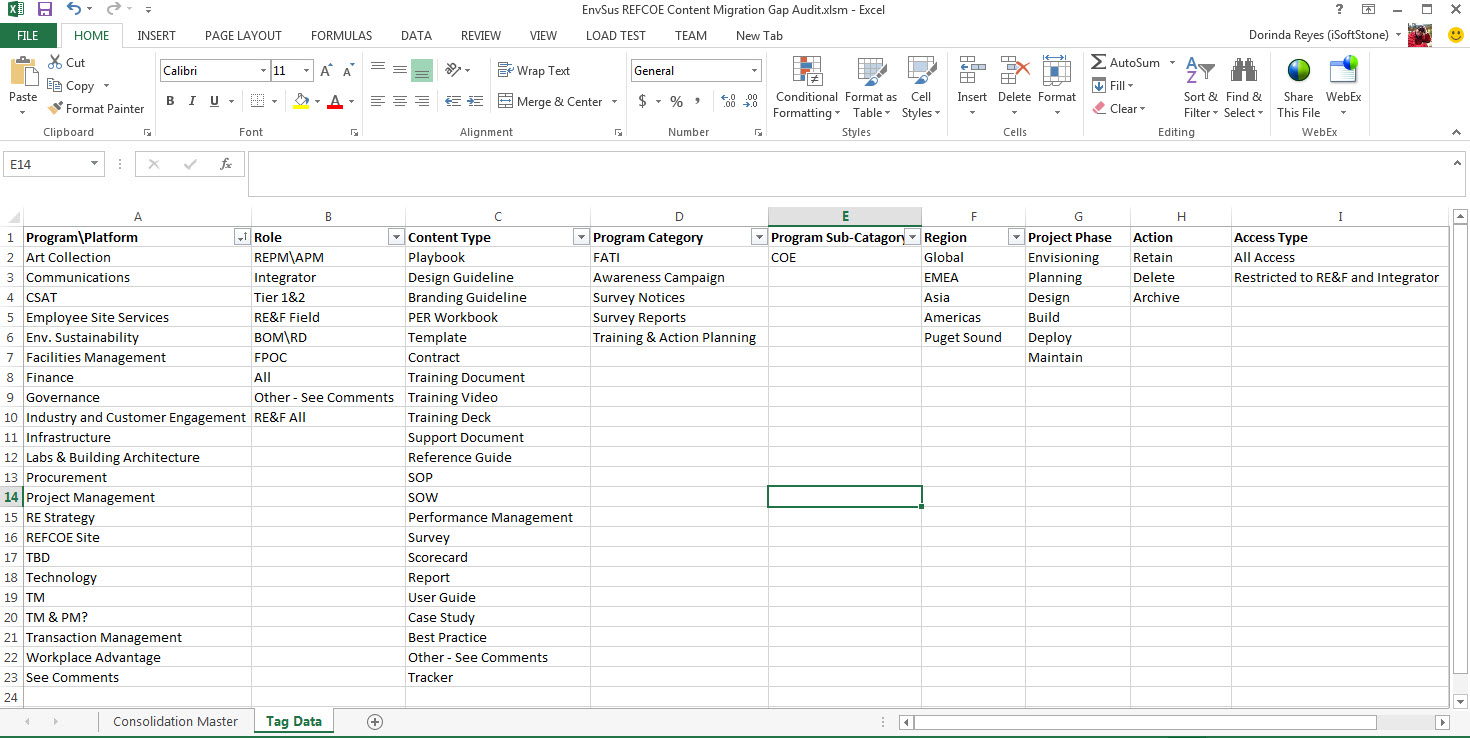
Use this spreadsheet to help you map your content. This is especially helpful when you are consolidating from multiple site collection. It can also be used to weed out outdated content so that only the most relevant content is migrated over.
There are occasions when you will be consolidating content from multiple site collection as well as reviewing the existing content to see if it needs to be migrated to your new O365 environment. You can run you a report using one of the vendors mentioned before to provide you with the detail of all of your content to use.
It will be important to have a site hierarchy and know what sites or content will be going to which locations.
The Content Mapping Spreadsheet will also allow you to map your tagging and disposition of content based on your review. It is easy to modify to your organization so that the drop-down menus are relevant. In the example below you can see that quite a bit of the tagging is captured so that when you move this content you know what the new tags will be.

Once you have all of the tags you will want to use and a complete inventory of your content you can then apply these tags.
Pre-Migration Checklist
This checklist is used to track information about the source site of the migration and any special configurations or needs that maybe needed for and prior to migration and the size of the migration.
- Pre-Migration Checklist Title: _________________________________________
- Source Location __________________________________________________
- Target Location __________________________________________________
Does your site include any High Business Impact (HBI)?(Yes/No) _____________________________ - Does your site leverage BI Capabilities? (Yes/No) _____________________
- Does a tool or other application link to your current site? (Yes/No) __
- Create destination site collection in SharePoint Online
- Create site collection
- Add site collection administrators
- Configure destination site collection
- Activate site collection features based on Site Template
- SharePoint Server Enterprise Site Collection features
- SharePoint Server Publishing Infrastructure
- SharePoint Server Standard Site Collection features
- Activate site features
- SharePoint Server Enterprise Site Collection features
- SharePoint Server Publishing Infrastructure
- SharePoint Server Standard Site Collection features
- Metadata Navigation and Filtering
- Team Collaboration Lists
- Increase site storage limit
- Import Term Store Metadata
- Create Site Columns
- Create Content Types
Migration Checklist
Use this checklist to create an entry for each site being migrated. This checklist is used to track all items that need to be done for the migration by both the on-shore and off-shore teams (if applicable). The detailed instructions with the actual steps are included in Migration guide.
- Migration Checklist Title: _________________________________________
- Source Location __________________________________________________
- Target Location __________________________________________________
- Migrate Site Structure
- With Content and Permissions
- No Content an Permissions
- Just Content
- Just Permissions
- Import Design Package (if applicable)
- Migrate Resource Files (if not using a Design Package import)
- Master Pages
- Page Layouts
- Web Parts
- CSS files
- SharePoint Designer Objects
- Display Templates
- XSL Templates (if applicable)
- HTML and XSL Templates (if applicable)
- Publish all resource files (if not using a Design Package import)
- Master Pages
- Page Layouts
- CSS files
- SharePoint Designer Objects
- Display Templates
- XSL Templates (if applicable)
- HTML and XSL Templates (if applicable)
- Apply master page to site
- Set Navigation
- Structured
- Managed
- Update search settings URL (if applicable)
It is important to know the type of migration you are going to be performing prior to this step (In -Place Update, Lift and Shift, Map and restructure) as it will determine the order of the migration of the Site, Content Types, Permission and content that is being migrated.
Structure First then content (Large sites)
For large sites with lots of sub-sites and nested sub-sites it is best practice to migrated the structure over only. If you already have all of your site columns and content types created you will want to include those as well as the list structure for each site. This will ensure that all of the content when it is eventually moved to the new location will not have any errors and match up with the tagging already in place.
While this is usually done for the larger sites, this can be done for most of the migrations to O365 (Lift and shift or Map and restructure).
Permissions can also be migrated for the sites themselves but it is recommended to migrate any unique permissions with the content.
Note: When you are doing your assessment it is a good idea to do a permission audit as well. (More to come on that)
Validation
Validation is important and time consuming you want to ensure that all of the content made the trip from source to target.
A visual check is usually all that is required, however I have noticed on occasion that O365 numbers specifically in reference to document libraries can vary. This is due to the way folder are counted, in 2010 you get only a file count, however in O365/2013 you get a file and folder count. So it does make the validation process a bit of a challenge.
I have found that opening the library in file explorer and checking the properties of the folder gives me an exact count of folder and documents, which then gives me the actual number I am validating against the source.
The checklist below details all of validations that need to be checked before you are live and ready to release the site to the customer for UAT.
- Page Layouts and Master Pages Published
- Applied correct master page
- Validate correct navigation has been applied
- Compare List counts Source vs Target
- Compare Library counts Source vs Target
- Validate all Content Source vs Target Match
- Lists
- Libraries
- Sub-Sites
- Validate Permissions
- Site
- List
- Library
- Item
Whew….
Ok, I think that is everything! Just remember every environment is different and it is important to do a test migration and follow all of the checklist to ensure when you do the real one to production you are in good shape.

Assess Current State
 Success or failure of a migration starts with the assessment of your current environment especially when it comes to migrating to the cloud. The services, features, templates and web parts are not 100% one to one available.
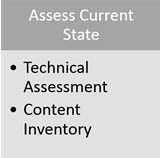
Technical Assessment
The biggest advantage of doing a technical assessments of your environment is to really find out what features have been enabled or added and what content has become stale, is it really useful, does it have purpose.
Below are just a few examples of the type of information that can be captured to make you better prepared:
- Site Templates: These templates vary from one version to the next as well as online versus on-premises. Work-spaces have been deprecated in O365 and are no longer available you will need to have a strategy to move the content from these sites or determine if they are even needed any longer.
- Features: For the most part most of the standard features from one version to the other have been kept. However, if you have any custom built features that you are currently using those will have to be evaluated to decide if they will be used on O365 and if so they will need to be recreated in order to have them work in the new environment.
- Web Parts: This is the one area that I spend a lot of time evaluating. The reason is in most cases when you see that there are issues with web parts it is due to configuration issues associated with changing environments. CQWP and Script editor web parts are good examples of what just needs to be reconfigured to work on the new environment. Where things get a bit more muddy is when you custom built web parts such as Data View web parts. These require a developer to actually go into the code and in some cases completely rebuild the web part to make it compatible with the O365 environment. Additionally, any custom built web part will need to be rebuilt to be used in the O365.
- Workflows: O365 uses by default 2013 Workflows, however if you have 2010 workflows those will migrate over as well. You will need to test them to ensure they are functioning as expected. These can be edited and modified if needed in SharePoint Designer 2013.
- Lists/Libraries: Reviewing your list and libraries is really critical when it comes to migrating to O365. This is due in large part to the thresholds that are put in place for performance purposes by the tenant. Unless you have an enterprise level plan a lot of restrictions are put in place. As with all of the previous versions there are limits that have been assigned to number of items etc. However it is important to remember we are also looking at the actual documents in these libraries to determine if they are still relevant.
- The Fab 40 that was available in the 2010 environments are not available online so your lists and libraries will migrate but some of the custom stuff included in those templates will not be available
- Master Pages, Page Layouts and Branding: One of the biggest areas of concern falls around master pages, page layouts and custom branding. For the most part all of this will have to be redone in some form or fashion. What does this mean? All custom master pages will need to be edited and updated to work on the O365 environment. This also includes any custom page layouts as well. If you have any custom XSL files or JQuery associated with these pages they will also need to be adjusted. CSS files will need to be edited to point to the correct locations.
Content Inventory
A lot of times SharePoint sites become glorified filing cabinets and content loses its purpose or value. With doing an assessment you get the ability to know what is really on your environment and using tools to help you run these assessments will ensure you are able to capture those critical areas that need to be addressed prior to migration.
By doing a deep dive into your sites, sub-sites, lists and libraries you will really get an understanding of just how much is really sitting in your environments as well as determine is it current, does it need to be archived, or should it just be deleted. When you are doing your content migration you will be able to use these three areas to ensure only the the correct data is being moved over.
While doing the content assessment keep the following limitations in mind and use the tools to flag areas that need to be addressed prior to migration:
- List Analysis: 5000
- While you can have a lot more items in your lists and libraries the ability to use filtering by columns is disabled if over 5000 items is exceeded. You can enable the feature Metadata Navigation and Filtering to help boost this limit but it is also has thresholds as well.
- List Size Limitations (MB)
- O365 has very strict limitation for the file sizes that can be uploaded to the tenant. If you are not using an enterprise plan this limitation cannot be adjusted.
- Item Size Limitations (MB)
- The default value is 50 MB, but this can be adjusted. SharePoint Online maximum size allowed is 250 MB.
- Additional areas to consider:
- File Path Length should not exceed 256 characters
- Blocked File Extensions
- Invalid Characters
- Name Ending Strings
As you can see just by doing this assessment you will be able to determine the level of effort needed to complete these changes as well as the types of resources you are going to need (PM, BA, Developer).
Assessing your current environment and evaluating the content and technical requirements are in place will continue you down the road to a successful migration.

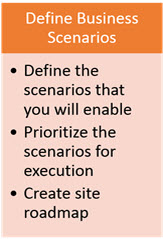
Define Business Scenarios
 What does it mean to define your business scenario?
Well for this purpose it means to determine the type of migration you are going to have and then determine all of the tasks that need to be in place to make it successful.
You will need to decide what type of migration you are going to do:
• In-Place Update
• Lift and Shift
• Map and restructure
In-Place: This is really more for the on -premise migrations that are going to do a in place database upgrade to the latest version of SharePoint. You will still want to follow best practice and do the upgrade first on a mirrored dev/test environment to ensure it will not have any ill effects.
Lift and Shift: This is usually what is used to migrate to Office 365 and keeping the same site hierarchy and structure in place just moving it to the cloud. This will require a lot more preparation to ensure it is successful and we will cover that in the next few weeks.
Map and restructure: This can also be done when you are migrating to O365 and requires a complete site audit of all content and mapping the content to the new hierarchy in the new online environment.
Prioritize the scenarios for the execution
With all of these options you do not just want to jump in blindly. You will want to determine all of the task that need to be done, the order they need to be executed and who the owners of these tasks are going to be. They can be one or two people or an entire team. Making sure you have individuals that will be invested and take an active ownership role is key to staying on track.
Create site road-map
You will want to evaluate your current site and create a site map. This will help you determine just how deep and what sites and content are really on the environment. I can’t tell you how many times when starting these type of projects I run into customers who have no idea the size and depth their SharePoint environment really is. This will also help you in your content audit and to determine if the current hierarchy is the right one or if you need to think about creating a better structure for your sites.
There are several ways that you can automate the site map process. Inside SharePoint you can go to the “/_layouts/15/vsubwebs.aspx” at the site collection level and it will provide you a list of the entire Site Hierarchy structure. From here you can copy and paste into Word or Excel.
Visio has the ability to connect to a SharePoint environment and crawl that space to create the site map, as do Publisher.
Several third party tools are available as well that can be used to crawl the environment as well as create a site map of all of the sites and list and libraries of each of the sites as well. Metavis, Metalogix and ShareGate are excellent options and all of the offer trial version so you can test drive them to see if they will meet your needs long term for the migration of the content.
Prepare for Migration Domination -tion -tion
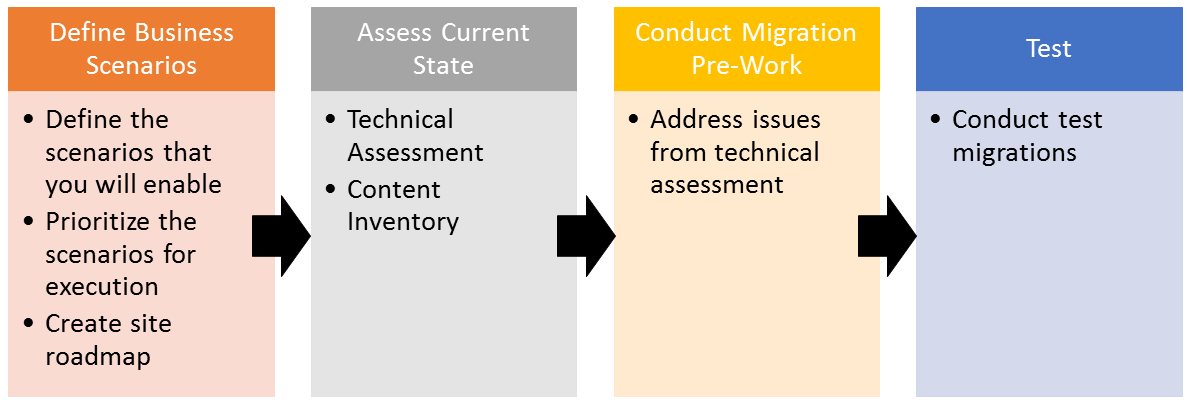 Over the course of the next several weeks I will be posting about how to conduct a successful migration to O365 SharePoint Online. Below is an outline of subjects that will be covered:
- Define Business Scenarios
- Define the scenarios that you will enable
- Prioritize the scenarios for the execution
- Create site road-map
- Assess Current State
- Technical Assessments
- Content Inventory
- Conduct Migration Pre-Work
- Address issues from Technical Assessments
- Test
- Conduct test migrations
- UAT
